Facial cupping is an ancient beauty technique that has gained renewed popularity in recent years. This gentle massage method uses small suction cups to stimulate the skin and underlying tissues, offering a range of potential benefits for your complexion. Let’s explore what facial cupping is all about and why it’s become such a sought-after skincare treatment.
While at-home facial cupping kits are available, it’s best to start with a professional treatment to learn proper technique and pressure. Improper use can potentially cause bruising or broken capillaries.
Facial cupping offers a gentle, non-invasive way to potentially improve your skin’s appearance and health. While more research is needed to fully understand its effects, many people find it to be a relaxing and beneficial addition to their skincare routine. If you’re curious about facial cupping, consider booking a session with a trained professional to experience its potential benefits for yourself.
Introduction to Facial Cupping
Facial cupping is a popular skincare technique that can help improve circulation, reduce puffiness, and promote a youthful glow. This ancient practice has gained modern popularity for its potential benefits in facial rejuvenation. In this article, we’ll guide you through 13 essential steps to create the perfect facial cupping routine at home.
Step 1: Gather Your Facial Cupping Supplies
To begin your facial cupping journey, you’ll need to assemble the right tools. A proper facial cupping routine requires specific equipment to ensure safety and effectiveness. Here’s what you’ll need:
- Facial cupping set (usually includes various sizes of silicone cups)
- Facial oil or serum
- Clean towel
- Gentle cleanser
- Moisturiser
Facial cupping sets are widely available online or in beauty supply stores. Look for cups specifically designed for facial use, as they’re smaller and gentler than those used for body cupping. Silicone cups are ideal for beginners due to their flexibility and ease of use.
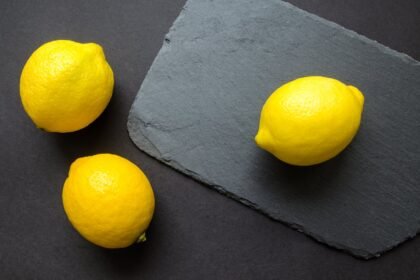
When choosing a facial oil or serum, opt for products that are non-comedogenic and suitable for your skin type. Popular options include jojoba oil, rosehip oil, or a lightweight facial serum. These will help the cups glide smoothly across your skin, reducing friction and potential irritation.
Ensure all your supplies are clean and ready before you begin your facial cupping routine. This preparation will help you achieve the best results and maintain proper hygiene throughout the process.
Step 2: Cleanse Your Face Thoroughly
Before diving into your facial cupping routine, it’s crucial to start with a clean canvas. Proper cleansing removes dirt, oil, and makeup, allowing the cupping technique to work more effectively on your skin.
Follow these steps for a thorough cleanse:
- Remove any makeup using your preferred makeup remover.
- Wet your face with lukewarm water.
- Apply a gentle, pH-balanced cleanser suitable for your skin type.
- Massage the cleanser into your skin using circular motions for about 30 seconds.
- Rinse thoroughly with lukewarm water.
- Pat your face dry with a clean, soft towel.
Avoid using harsh scrubs or exfoliants before facial cupping, as they may sensitise your skin. If you have sensitive skin, consider using a mild, fragrance-free cleanser to minimise potential irritation.
Remember, the goal of this step in your facial cupping routine is to create a clean surface for the cups to work on, enhancing the overall effectiveness of the treatment.
Step 3: Apply Facial Oil or Serum
After cleansing, the next crucial step in your facial cupping routine is to apply a suitable facial oil or serum. This step is essential for creating a smooth surface that allows the cups to glide effortlessly across your skin, reducing friction and preventing discomfort.
Here’s how to apply the oil or serum effectively:
- Choose a facial oil or serum appropriate for your skin type.
- Dispense a small amount (about 3-4 drops) onto your palm.
- Warm the product between your hands by rubbing them together.
- Gently press and pat the oil or serum onto your face and neck.
- Use upward motions to distribute the product evenly.
Popular oils for facial cupping include jojoba oil, argan oil, and rosehip oil. These oils are lightweight and easily absorbed, making them ideal for this purpose. If you prefer, you can also use a hydrating serum with ingredients like hyaluronic acid or niacinamide.
Ensure you apply enough product to create a slippery surface, but avoid over-applying, as this can make the cups too slippery and reduce their effectiveness. The right amount of oil or serum will allow the cups to create suction without dragging or pulling on your skin.
Remember, facial cupping is all about enhancing your skin’s health and appearance, so choosing the right product to complement this technique is crucial for achieving optimal results.
Step 4: Start with Gentle Neck Massage
Before diving into facial cupping, it’s beneficial to begin with a gentle neck massage. This step helps to relax the muscles and prepare the lymphatic system for the cupping process. A relaxed neck and décolletage area can enhance the overall effectiveness of your facial cupping routine.
Follow these steps for a soothing neck massage:
- Apply a small amount of oil to your neck and décolletage area.
- Using your fingertips, start at the base of your neck and work upwards with gentle, upward strokes.
- Pay special attention to the sides of your neck, where lymph nodes are located.
- Use circular motions around your collarbone area.
- Spend about 1-2 minutes on this massage.
This preliminary massage helps to warm up the tissues and stimulate blood flow. It also begins the process of lymphatic drainage, which is one of the key benefits of facial cupping. By starting with the neck, you’re creating a pathway for toxins and excess fluids to be flushed out more effectively during the cupping process.
Remember, the goal of facial cupping is not just about the face itself, but about improving overall circulation and lymphatic flow in the entire upper body area. This neck massage sets the stage for a more effective facial cupping session.
Step 5: Begin Facial Cupping on Your Chin and Jawline
Now that you’ve prepared your skin and relaxed your neck muscles, it’s time to start the actual facial cupping process. Begin with your chin and jawline, as this area often holds tension and can benefit greatly from the cupping technique.
Follow these steps for cupping your chin and jawline:
- Choose a small or medium-sized cup from your facial cupping set.
- Gently squeeze the cup to create suction and place it on your chin.
- Glide the cup along your jawline towards your ear.
- Repeat this motion 3-5 times on each side of your face.
- Pay extra attention to areas where you feel tension or puffiness.
When cupping your chin and jawline, use light to moderate suction. The skin in this area is relatively firm, but you still want to avoid applying too much pressure. The goal is to stimulate blood flow and lymphatic drainage, not to cause discomfort or bruising.
As you move the cup along your jawline, you may feel a slight lifting sensation. This is normal and indicates that the cupping is working to improve circulation and reduce puffiness in this area. Many people find that regular facial cupping along the jawline can help define this area and give a more sculpted appearance over time.
Remember, facial cupping is a gentle process. If at any point you feel discomfort, reduce the suction or take a break. With practice, you’ll find the right pressure and technique that works best for your skin.
Step 6: Move to Your Cheeks
After working on your chin and jawline, the next area to focus on in your facial cupping routine is your cheeks. The cheeks are a larger area of the face and can benefit greatly from the circulation-boosting effects of cupping.
Here’s how to effectively cup your cheeks:
- Select a medium-sized cup from your facial cupping set.
- Start at the centre of your cheek, near your nose.
- Gently squeeze the cup to create suction and place it on your cheek.
- Glide the cup outwards towards your hairline.
- Repeat this motion 3-5 times on each cheek.
- Pay special attention to areas where you have fine lines or loss of firmness.
When cupping your cheeks, you can experiment with different directions. While the general rule is to move upwards and outwards, some people find benefit in also cupping from the jawline up towards the cheekbone. This can help to lift and contour the face.
The cheek area is typically less sensitive than other parts of the face, so you may be able to use slightly more suction here. However, always start gently and increase pressure gradually. The goal is to create a pleasant sensation of lift and stimulation, not discomfort.
Many people report that regular facial cupping on the cheeks can help to improve skin texture, reduce the appearance of fine lines, and even provide a natural “lifting” effect over time. As with all aspects of facial cupping, consistency is key to seeing results.
Remember, facial cupping is about enhancing your natural beauty, not dramatically changing your appearance. Enjoy the process and the immediate glow it can bring to your cheeks!
Step 7: Address the Forehead and Between the Brows
The forehead and the area between the eyebrows (often referred to as the “11s”) are common areas of concern for many people. Facial cupping can be particularly effective here, helping to smooth out fine lines and relieve tension that often accumulates in these areas.
Follow these steps to cup your forehead and between your brows:
- Choose a small or medium-sized cup, depending on the size of your forehead.
- Start at the centre of your forehead, just above your eyebrows.
- Gently squeeze the cup to create suction and place it on your skin.
- Glide the cup horizontally towards your temple.
- Repeat this motion 3-5 times, moving slightly higher each time until you reach your hairline.
- For the area between your brows, use a small cup and make gentle upward strokes.
When cupping your forehead, it’s important to use light pressure. The skin here is thinner and more delicate than on your cheeks, so be extra gentle. The goal is to stimulate circulation and promote relaxation, not to create discomfort.
Pay special attention to any areas where you notice fine lines or wrinkles. While facial cupping isn’t a miracle cure for wrinkles, many people find that regular practice can help to soften these lines over time by improving skin elasticity and promoting collagen production.
For the area between your brows, very gentle upward strokes can help to release tension that often accumulates here. This can be particularly beneficial if you tend to furrow your brow frequently.
Remember, facial cupping is about more than just physical appearance. The gentle massage-like action can also help to relieve stress and promote relaxation, which in turn can help to prevent the formation of new tension lines.
Step 8: Don’t Forget Your Under-Eye Area
The under-eye area is one of the most delicate parts of the face, but it can also benefit greatly from facial cupping when done correctly. This area is prone to puffiness and dark circles, which gentle cupping can help to alleviate.
Here’s how to safely cup your under-eye area:
- Choose the smallest cup in your facial cupping set.
- Apply a bit more oil to this area to ensure smooth gliding.
- Use extremely gentle suction – the lightest touch possible.
- Start at the inner corner of your eye, near your nose.
- Gently glide the cup outwards towards your temple.
- Repeat this motion 2-3 times, being careful not to tug at the delicate skin.
When cupping the under-eye area, less is definitely more. The skin here is very thin and sensitive, so use the lightest touch possible. The goal is to gently stimulate lymphatic drainage and improve circulation, which can help reduce puffiness and dark circles.
It’s crucial to keep the cup moving in this area – do not let it sit stationary at any point. Stationary cupping could potentially cause bruising or broken capillaries in this delicate area.
Many people find that regular, gentle cupping of the under-eye area can help to brighten and refresh their appearance. It can be particularly beneficial if you’re prone to fluid retention or if you’ve had a late night.
Remember, while facial cupping can be beneficial for the under-eye area, it’s not a substitute for good sleep, hydration, and a healthy lifestyle. Combine your facial cupping routine with these healthy habits for the best results.
If you have any concerns about cupping this sensitive area, consult with a skincare professional or consider skipping this step and focusing on other areas of your face.
Step 9: Focus on Nasolabial Folds and Smile Lines
The nasolabial folds, also known as smile lines or laugh lines, are a common area of concern for many people. Facial cupping can be an effective way to address this area, helping to soften these lines and promote a more youthful appearance.
Follow these steps to cup your nasolabial folds:
- Select a small or medium-sized cup from your facial cupping set.
- Start at the corner of your nose.
- Gently squeeze the cup to create suction and place it on your skin.
- Glide the cup diagonally upwards towards your cheekbone.
- Repeat this motion 3-5 times on each side.
- Pay extra attention to areas where the lines are more pronounced.
When cupping this area, it’s important to use gentle to moderate suction. The skin here is relatively thick compared to other parts of the face, but you still want to avoid applying too much pressure. The goal is to stimulate blood flow and encourage collagen production, which can help to plump up the skin and reduce the appearance of these lines over time.
Many people find that regular facial cupping along the nasolabial folds can help to soften these lines and give a more lifted appearance. The cupping action can help to release tension in the muscles around the mouth, which can contribute to the formation of these lines.
Remember, while facial cupping can be beneficial for addressing smile lines, it’s not an instant fix. Consistency is key, and you may need to practice this technique regularly over time to see noticeable results. Also, keep in mind that these lines are a natural part of facial expression and aging, and the goal is to soften them, not eliminate them completely.
As always with facial cupping, if you experience any discomfort or notice any unusual reactions, stop the treatment and consult with a skincare professional.
Step 10: Finish with a Full Face Sweep
As you near the end of your facial cupping routine, it’s time for a full face sweep. This step helps to integrate all the work you’ve done on individual areas and promotes overall lymphatic drainage and circulation.
Here’s how to perform a full face sweep:
- Choose a medium-sized cup from your facial cupping set.
- Start at the centre of your chin.
- Gently squeeze the cup to create suction and place it on your skin.
- Glide the cup upwards along your jawline, then up your cheek towards your temple.
- Continue the motion across your forehead and down the other side of your face.
- Repeat this sweeping motion 3-5 times.
When doing the full face sweep, use light to moderate suction. The goal is to create a gentle, flowing movement across your entire face. This helps to encourage lymphatic drainage and can leave your skin looking refreshed and glowing.
Many people find this step particularly relaxing and enjoyable. It can help to relieve tension in facial muscles and promote a sense of overall well-being. The sweeping motion can also help to distribute facial oils evenly across your skin, ensuring maximum benefit from your skincare products.
Remember, facial cupping is not just about addressing specific concerns, but about promoting overall skin health and radiance. This full face sweep is a great way to conclude your cupping session and leave your skin looking and feeling revitalised.
As always, listen to your skin. If at any point during the full face sweep you feel discomfort, reduce the suction or take a break. With practice, you’ll find the right pressure and technique that works best for your skin.

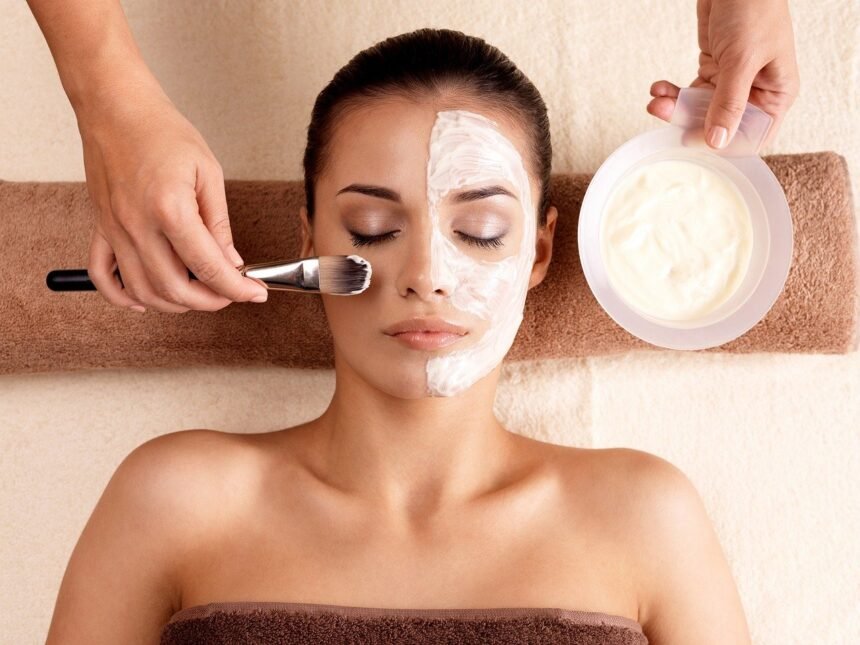
Step 11: Apply a Hydrating Mask or Serum
After completing your facial cupping routine, your skin is primed and ready to absorb nutrients. This makes it the perfect time to apply a hydrating mask or nourishing serum. This step helps to lock in the benefits of your cupping session and provides additional skincare benefits.
Follow these steps to complete this part of your facial cupping routine:
- Choose a hydrating mask or nourishing serum suitable for your skin type.
- If using a mask, apply a thin, even layer across your face and neck.
- If using a serum, apply a few drops and gently pat it into your skin.
- Allow the product to absorb for 10-15 minutes.
- If you’ve used a mask, rinse off with lukewarm water and pat dry.
When selecting a product for this step, look for ingredients that complement the benefits of facial cupping. Hyaluronic acid is excellent for hydration, while ingredients like vitamin C or niacinamide can help to brighten and even out skin tone. Peptides or collagen-boosting ingredients can further enhance the firming effects of your cupping routine.
Many people find that their skin absorbs products more effectively after facial cupping. This is because the cupping process increases blood flow to the skin’s surface and can temporarily enhance skin permeability. Take advantage of this by using high-quality, nutrient-rich products at this stage.
Certainly! I’ll continue with the remaining steps for your “13 Steps to a Perfect Facial Cupping Routine” article.
Step 12: Moisturise and Protect
After your facial cupping session and the application of a hydrating mask or serum, it’s crucial to lock in all the benefits with a good moisturiser. This step helps to maintain the hydration and nourishment your skin has received, prolonging the effects of your facial cupping routine.
Here’s how to properly moisturise after facial cupping:
- Choose a moisturiser suitable for your skin type.
- Take a small amount of the product and warm it between your palms.
- Gently press the moisturiser into your skin, starting from the centre of your face and moving outwards.
- Pay special attention to areas that tend to be drier, such as around the eyes and mouth.
- Don’t forget your neck and décolletage area.
When selecting a moisturiser, look for ingredients that complement the benefits of facial cupping. Ceramides can help to strengthen the skin barrier, while antioxidants like vitamin E can protect against environmental damage. If you’re doing your facial cupping routine in the morning, consider using a moisturiser with SPF to protect your skin from UV damage.
Many people find that their skin feels more receptive to moisturiser after facial cupping. The increased blood flow and temporary boost in skin permeability can allow the moisturiser to penetrate more effectively. Take advantage of this by using a high-quality product that addresses your specific skin concerns.
Remember, facial cupping can sometimes leave your skin looking a bit flushed immediately after the treatment. This is normal and usually subsides quickly. However, if you’re planning to go out immediately after your routine, you might want to allow some extra time for your skin to calm down before applying makeup.
By properly moisturising after your facial cupping routine, you’re helping to seal in all the benefits of the treatment and ensuring your skin stays hydrated and protected throughout the day or night.
Step 13: Maintain Consistency and Track Progress
The final step in perfecting your facial cupping routine is not a physical action, but rather a commitment to consistency and self-awareness. Regular practice and careful observation of your skin’s response are key to achieving the best results from facial cupping.
Here’s how to maintain consistency and track your progress:
- Set a regular schedule for your facial cupping routine. Most experts recommend 2-3 times per week.
- Keep a skincare journal to note any changes or improvements you observe.
- Take “before” photos and update them every few weeks to visually track progress.
- Pay attention to how your skin feels immediately after cupping and in the days following.
- Be patient – significant results often take several weeks or months to become apparent.
Consistency is crucial when it comes to facial cupping. While you may notice an immediate glow after each session, the long-term benefits – such as improved skin texture, reduced fine lines, and enhanced facial contours – typically require regular practice over time.
As you continue your facial cupping journey, you may need to adjust your routine. Perhaps you’ll find that certain areas of your face respond better to different cup sizes or pressure levels. Don’t be afraid to experiment and fine-tune your technique as you become more familiar with the process.
Remember, facial cupping is not just about physical appearance. Many people report feeling more relaxed and experiencing reduced facial tension after regular cupping sessions. Take note of these holistic benefits as well.
Lastly, while facial cupping can be a wonderful addition to your skincare routine, it’s important to maintain realistic expectations. It’s not a miracle cure, but rather a tool to enhance your overall skin health and appearance when used consistently and in conjunction with a good skincare regimen.
By maintaining consistency and tracking your progress, you’ll be able to fully appreciate the benefits of your facial cupping routine and continue to refine your technique for optimal results.
Table: Facial Cupping Do’s and Don’ts
| Do’s | Don’ts |
|---|---|
| Cleanse your face thoroughly before cupping | Use facial cupping on broken or irritated skin |
| Use a facial oil or serum for smooth gliding | Apply too much pressure, especially on delicate areas |
| Start with gentle pressure and increase gradually | Leave cups stationary on the skin |
| Move cups in upward and outward motions | Use facial cupping if you have severe acne or rosacea |
| Clean your cups after each use | Overdo it – stick to 2-3 sessions per week |
| Be consistent with your routine | Expect overnight miracles – results take time |
| Listen to your skin and adjust as needed | Skip moisturising after your cupping session |
FAQ Section
Q: How often should I do facial cupping?
A: Most experts recommend doing facial cupping 2-3 times per week for optimal results. However, listen to your skin and adjust the frequency as needed.
Q: Is facial cupping safe for all skin types?
A: While facial cupping is generally safe for most skin types, those with severe acne, rosacea, or very sensitive skin should consult a dermatologist before trying it.
Q: Can facial cupping cause bruising?
A: When done correctly, facial cupping should not cause bruising. Always use gentle pressure and keep the cups moving to avoid this issue.
Q: How long does a facial cupping session typically take?
A: A full facial cupping routine usually takes about 10-15 minutes, not including the time for cleansing and applying skincare products.
Q: Can I do facial cupping if I’ve had Botox or fillers?
A: It’s best to wait at least two weeks after Botox or filler treatments before doing facial cupping. Always consult with your dermatologist or aesthetician.
Remember, facial cupping is a technique that requires practice and patience. By following these 13 steps and maintaining consistency, you can develop a perfect facial cupping routine that enhances your skin’s health and appearance.