The art of bonsai is traditionally associated with ancient pines, maples, and junipers, meticulously pruned over decades. However, a modern twist on this ancient practice has recently taken the indoor gardening world by storm: the coconut bonsai.
Also known as Coco-bonsai, this technique involves growing a coconut palm (Cocos nucifera) in a small container, often with the nut exposed, creating a striking architectural statement piece. Unlike traditional woody bonsai, the coconut palm does not develop true bark or branches, but its exposed root system and arching fronds offer a unique tropical aesthetic.
While creating a coconut bonsai DIY project is rewarding, it requires patience and a specific understanding of tropical plant care. This guide explores the science behind the growth, the steps to cultivation, and how to maintain this stunning plant in a home environment.
Understanding the Coconut Palm
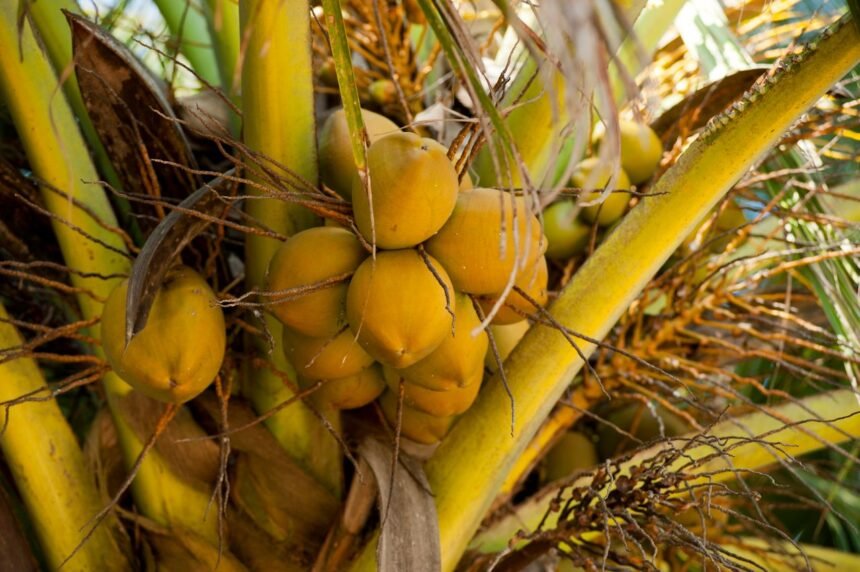
Before diving into the planting process, it is helpful to understand the biology of the seed. The coconut is not a true nut but a drupe. The hard shell we are familiar with is the endocarp, surrounding the seed. Inside, the A Detailed Look at Raw Coconut Meat Nutrition and Health Facts reveals that the white flesh (endosperm) provides the massive energy reserves required for the shoot to penetrate the thick husk and survive months of drifting at sea.
In a bonsai setting, we rely on this internal energy store to support the plant during its initial growth phases before the roots are fully established in the bonsai soil mix composition.
Can You Make a True Bonsai from a Coconut?
Strictly speaking, palms cannot be “trained” like dicot trees (e.g., oaks or maples) because they lack a cambium layer. You cannot wire the trunk to bend it, nor will pruning leaves reduce the leaf size permanently. However, by restricting root space and managing light, you can create a dwarf coconut tree bonsai effect that remains manageable indoors for several years.
Step 1: Selection and Preparation
Success begins with selecting the right nut. You can purchase a pre-sprouted coconut or start from scratch.
If starting from a store-bought coconut, ensure it is fresh. Shake it to hear the water inside. If it is silent, the water has dried up, and the seed is likely dead. For the best results, look for a nut that already has a small sprout emerging from one of the three “eyes.”
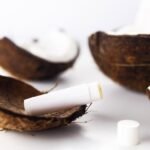
Husk Removal
To achieve the classic bonsai look, you must perform coconut husk removal. This reveals the smooth, hard shell.
- Soak the nut: Soaking the coconut in water for 2-3 days softens the fibers.
- Peel away fibers: Using pliers or a strong knife, carefully strip the husk away. Be extremely gentle near the “eyes” to avoid damaging the sprout.
- Polish: Once the husk is gone, you can sand the shell for a polished look. (Save the husk fibers! The Benefits of Using Coconut Husk Chips for Orchid Potting outlines how this material is excellent for aeration in other plants).
Step 2: Sprouting Techniques
If your nut hasn’t sprouted yet, you will need to induce germination. Successful coconut sprouting techniques mimic the humid, warm conditions of a tropical beach.
Place the nut in a bucket of water and weight it down so it stays submerged. Change the water daily. Alternatively, place the nut in a sealed plastic bag with a little water and keep it in a warm, dark place (around 25°C to 30°C).
Germination can take anywhere from 3 to 6 months. Patience is essential. Once a white shoot appears and roots begin to emerge, it is time to plant.
Step 3: Potting and Soil
Proper bonsai pot selection is critical. Unlike deep nursery pots, bonsai pots are shallow. However, because coconut roots grow vertically and aggressively, you may need a slightly deeper container than a traditional bonsai tray to start.
The Soil Mix
Coconut palms hate “wet feet” (roots sitting in stagnant water), which leads to rot. Your soil must be free-draining.
- 40% High-quality potting soil
- 30% Perlite or pumice
- 30% Coarse sand or grit
Many enthusiasts wonder about aesthetics. While some use standard pots, others embrace the tropical theme. Sustainable Living: Why Every Kitchen Needs a Coconut Shell Bowl discusses the durability of shells; similarly, some growers use a larger, halved coconut shell as the pot itself for smaller specimens.
Position the nut so that the shell sits on top of the soil, with only the roots buried. This “floating nut” look is the signature of the style.
Care and Maintenance
Once potted, your coconut bonsai requires consistent care to thrive indoors in the UK climate.
Light Requirements
Coconuts are heliotropic—they crave the sun. Place your bonsai in the sunniest window available, preferably South-facing. Without adequate light, the fronds will become long, leggy, and weak. If natural light is insufficient, full-spectrum LED grow lights are necessary.
Watering and Hydration
Developing a bonsai watering schedule is more art than science. The soil should be kept moist but never soggy. Stick your finger an inch into the soil; if it feels dry, water thoroughly until it runs out of the drainage holes.
Water quality matters. Hard tap water can cause mineral buildup. Some growers use rain water or distilled water. Think of it like The Ultimate Guide to Using Coconut Water Powder for Hydration; just as quality hydration matters for the body, pure water prevents leaf tip burn in sensitive palms.
Temperature and Humidity
Maintaining bonsai humidity is perhaps the biggest challenge in UK homes, which are often dry due to central heating. Coconuts prefer humidity levels above 60%.
- Mist daily: Use a spray bottle to mist the leaves.
- Humidity tray: Place the pot on a tray filled with pebbles and water.
- Avoid drafts: Keep the plant away from radiators and cold windows.
Failure to maintain humidity is often why leaves turn brown and crispy. Tropical bonsai temperature requirements dictate that the ambient temperature should never drop below 18°C (64°F), though they prefer it closer to 25°C (77°F).
Shaping and Structural Support
As the plant grows, the heavy nut may shift. You might need to stabilize it.
The Strength and Durability of Coconut Fiber Rope in Gardening makes it an ideal, aesthetic choice for tying the nut down to the pot without damaging the shell. Over time, the roots will anchor the plant firmly, and the supports can be removed.
Pruning
While you cannot prune the trunk, you should prune old, yellowing leaves to maintain the bonsai aesthetic. Cut them close to the trunk using sharp, sterilized shears. Some growers also practice root pruning for beginners during repotting to keep the plant miniature, though this is risky with palms and should be done sparingly.
Troubleshooting Common Issues
Even with the best care, indoor coconut plant care comes with hurdles.
Yellowing Leaves
This is often a sign of nutrient deficiency. Palms are heavy feeders. Use a specific fertilizer for coconut palms that is rich in manganese, iron, and magnesium. Yellowing can also indicate overwatering.
Pests
Common pests on coconut bonsai include spider mites and mealybugs, which thrive in dry indoor air. Inspect the undersides of leaves regularly. If you spot pests, wipe the leaves with a solution of water and mild soap.
While we look to Exploring the Health and Digestive Coconut Vinegar Benefits for our own gut health, a diluted vinegar solution can sometimes be used to clean mineral deposits off the pot, though it should not be used directly on the plant’s roots as a fungicide unless heavily diluted.
Root Health
Preventing root rot in bonsai is easier than treating it. Ensure your pot has adequate drainage holes. If the nut starts to smell musty or feels soft, rot has likely set in, and the plant may be difficult to save.
Safety and Sustainability
When caring for your plant, consider the environment and safety. If you have pets, check plant toxicity. While coconuts are generally non-toxic, the fibrous parts can be a choking hazard. For skin care, The Surprising Benefits of Using Coconut Oil Dogs Can Enjoy highlights how natural oils are safe for pets; similarly, if you use leaf shine products, opt for natural oils rather than synthetic chemicals that might harm curious pets.
Furthermore, gardening can take a toll on your hands. Handling the rough husk and soil can dry out skin. Just as Managing Your Symptoms: Using Coconut Oil Psoriasis Treatments suggests, applying coconut oil to your hands after gardening is an excellent way to restore moisture barrier function.
Tips for the Perfect Aesthetic
- Leaf Shining: To keep shaping coconut leaves looking glossy, wipe them with a soft damp cloth. Some growers use a tiny drop of coconut oil for shine, akin to the cosmetic appeal discussed in Does Coconut Charcoal Teeth Whitening Actually Work?—cleanliness and polish make the difference.
- Growth Speed: Do not expect rapid changes. The growth is slow and steady. Much like the metabolic discussion in Is Coconut Sugar Keto Friendly? Everything You Need to Know, the plant utilizes energy slowly and efficiently. Rushing it with excess fertilizer will only burn the roots.
- Shell Preservation: To prevent the exposed shell from cracking or rotting over the years, you can seal it with a clear, matte varnish.
The Bottom Line
Growing a coconut bonsai is a labor of love that brings a slice of the tropics into your home. It requires high light, high humidity, and a well-draining bonsai soil mix composition.
While it demands more attention than a standard houseplant, the result—a sprouted coconut sitting elegantly atop a small pot—is a conversation starter like no other. By following these guidelines, you can cultivate a healthy, vibrant miniature palm that thrives for years.
Whether you are an expert botanist or a curious beginner, the journey of nurturing a seed from the ocean into a piece of living art is deeply rewarding.