Imagine making your own fizzy drinks at home using just ginger, sugar, and water. It sounds like magic, but it is simple science. This mixture is called a ginger bug starter. It is the secret engine behind homemade ginger beer and other sparkling sodas.
Many people in the UK are rediscovering traditional food skills. Making a ginger bug is one of the easiest ways to start. You do not need expensive kit or a degree in biology. You just need patience and a few basic ingredients.
Once you have a healthy bug, you can create endless probiotic soft drinks for your family. These drinks are often lower in sugar than shop-bought colas. Plus, they are full of life—literally.
Key Takeaways
* A ginger bug is a natural culture made from fresh ginger, sugar, and water.
* It captures wild yeast from the air and ginger skin to create carbonation.
* The process takes about 5 to 7 days to get active.
* It requires daily feeding to stay alive and bubbly.
* You can use it to make naturally fizzy herbal teas, fruit juices, and ginger beer.
What Exactly Is a Ginger Bug Starter?
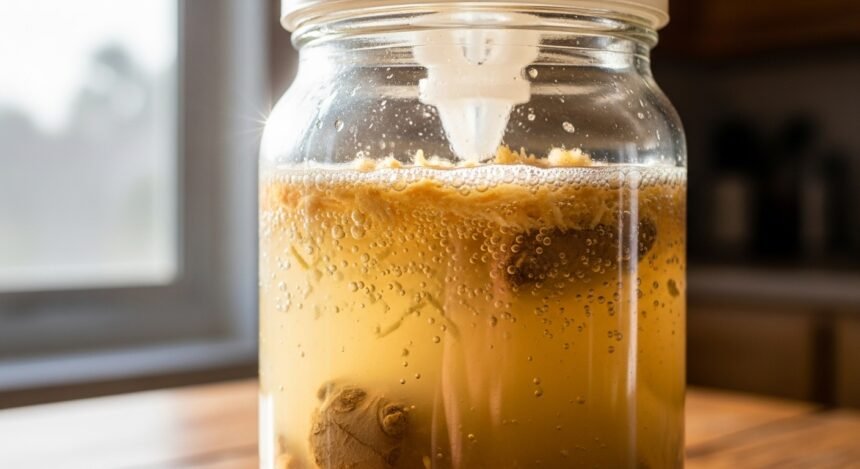
A ginger bug is a slurry of fermented ginger and sugar. It acts very much like a sourdough starter, but for sugary drinks instead of bread. It relies on wild yeast cultivation.
In every kitchen, there are microscopic yeasts and bacteria floating in the air. There are also natural organisms living on the skin of organic ginger root. When you mix the ginger with sugar and water, you create a perfect home for them.
The beneficial bacteria (mostly Lactobacillus) and yeasts eat the sugar. As they eat, they produce carbon dioxide (bubbles). This natural carbonation process is what makes your final drink fizzy.
Unlike commercial yeast packets you buy at the supermarket, a ginger bug is a living ecosystem. It changes based on your kitchen’s temperature and the ingredients you use.
Gut Health Benefits of Wild Fermentation
Fermented foods have been part of human diets for centuries. Today, we know they can support a healthy tummy.
When you make a lacto-fermented soda, you are consuming beneficial bacteria. These are often called probiotics. Probiotics may help improve your digestion and support your immune system. You can read more about probiotics on the NHS website.
Ginger itself is also a powerful ingredient. It has been used in traditional medicine to soothe upset stomachs and reduce nausea. Combining ginger with fermentation creates a drink that is both tasty and potentially good for your gut. For more on the benefits of ginger, check out this guide from BBC Good Food.
However, it is important to remember that these drinks contain sugar. While the yeast eats much of it, some sugar remains. Enjoy them as a treat rather than a water replacement.
Essential Ingredients and Equipment
You do not need much to get started. However, quality matters. Using the wrong water or ginger can kill your bug before it starts.
The Ingredients
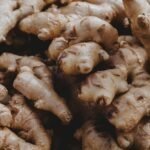
1. Organic Ginger Root: It is best to use organic ginger. Non-organic ginger is often irradiated or treated with chemicals that kill the natural yeast on the skin. You need that yeast for a successful homemade ginger beer plant.
2. White Sugar: Plain white granulated sugar works best. It is easy for the bacteria to eat. You can use raw cane sugar, but avoid honey or molasses at first, as they can be tricky.
3. Water: This is crucial. Tap water in the UK usually contains chlorine. Chlorine is added to kill bacteria, which is good for safety but bad for fermentation. You must use chlorine-free water. You can filter your tap water or boil it and let it cool completely.
The Equipment
* Glass Jar: A standard jam jar or a mason jar (500ml size) is perfect. Avoid plastic as it can scratch and harbour bad germs.
* Cloth Cover: You need to cover the jar to keep dust and flies out, but let air in. A piece of muslin, a clean tea towel, or a coffee filter works well. Secure it with an elastic band. This ensures proper fermentation jar safety.
* Wooden or Plastic Spoon: Metal spoons are generally okay if used briefly, but wood or plastic is traditional and safe for the culture.
How to Make a Ginger Bug: A 5-Day Guide
Building a bug takes about a week. The goal is to train the wild yeast to multiply. Here is your daily schedule.
Day 1: The Beginning
Combine 250ml of cool, filtered water with 2 teaspoons of white sugar in your jar. Chop or grate about a thumb-sized piece of organic ginger (skin on). Add 2 teaspoons of this ginger to the jar. Stir well until the sugar dissolves. Cover with your cloth and place it in a warm spot out of direct sunlight.
Day 2: The First Feed
Check your jar. You probably won’t see bubbles yet. That is normal. Add another 2 teaspoons of sugar and 2 teaspoons of chopped ginger. Stir well. Cover it back up.
Day 3: Signs of Life
You might start to see tiny bubbles rising to the surface. It might smell slightly yeasty. Feed it again with 2 teaspoons of sugar and 2 teaspoons of ginger. Stir vigorously. Stirring adds oxygen, which helps the yeast grow.
Day 4: Getting Active
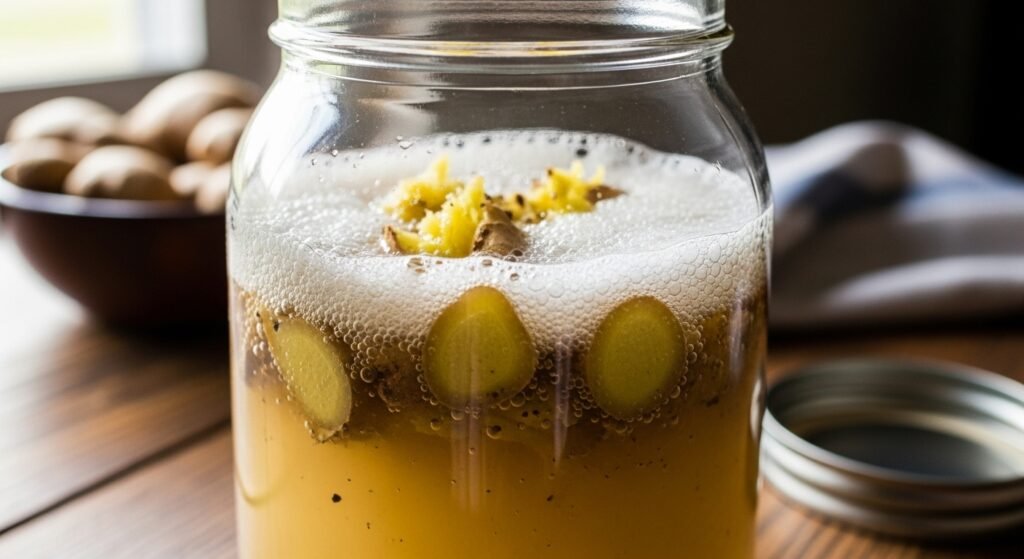
By now, the mixture should be cloudy. You should see more bubbles when you tap the jar. There might be a layer of white sediment at the bottom. This is white yeast sediment and is a good sign. Feed as usual (2 tsp sugar, 2 tsp ginger).
Day 5: Ready to Use?
If your bug is bubbling constantly and creates a fizzing sound when you stir it, it is ready. It should smell fresh, yeasty, and slightly gingery. If it is not bubbly yet, keep feeding it for another few days. Temperature plays a huge role here.
For more on how microorganisms work in food, you can read this overview by the Microbiology Society.
Feeding and Maintaining Your Live Culture
Once your bug is active, you cannot just leave it alone. It is a living pet. You must establish a sugar feeding schedule.
If you keep your bug on the kitchen counter, you must feed it daily. Give it 1 teaspoon of ginger and 1 teaspoon of sugar every day. If you forget for a day, it will likely be fine. If you forget for a week, it might starve.
Over time, the jar will get full of old ginger. You can strain out some of the old ginger pieces and replace the liquid with a little more water if needed. Always keep the liquid level high enough so the ginger stays submerged.
Maintaining a healthy environment prevents bad bacteria from taking over. According to the Food Standards Agency, basic hygiene is essential in the kitchen to prevent illness.
How to Spot Mould Versus Healthy Yeast
New fermenters often panic when they see something white on top. It is vital to know the difference between mould and yeast.
Kahm Yeast
Sometimes a thin, white, wavy film forms on top. This is often Kahm yeast. It is not harmful, but it can make your bug taste bad. It usually happens if the acidity is not right or there is too much oxygen. You can skim it off. This is a common part of ginger bug maintenance.
Mould
Mould is fuzzy. It can be green, black, blue, or pink. It grows on top of the ginger pieces that float above the water. If you see fuzzy mould, you must throw the whole batch away. Do not try to save it. Wash your jar thoroughly with hot soapy water before starting again.
To understand more about fungi and yeasts, Britannica offers a clear definition.
Troubleshooting: Why Is My Bug Not Bubbling?
If your bug is flat after 7 days, something is hindering the process. Let’s look at common issues.
1. It is too cold.
Yeast loves warmth. If your UK kitchen is freezing in winter, the bug will sleep. Try moving it to a warmer spot, like near the boiler or on top of the fridge. Proper brewing temperature control is key (ideally 20°C to 25°C).
2. The water has chlorine.
Did you use water straight from the tap? The chlorine might have killed the wild yeast. Start again with filtered or boiled-and-cooled water.
3. The ginger is sterile.
If you used standard supermarket ginger, it might have been irradiated. Switch to organic ginger to ensure you have live cultures.
4. Not enough sugar.
Yeast needs fuel. If you skimp on sugar, the yeast cannot reproduce. Do not worry about the sugar content of the bug itself; the yeast eats it.
For a deeper dive into how fermented foods impact health, check this article from Medical News Today.
How to Use Your Starter for Homemade Soda
Now for the fun part. You have a bubbling jar of goo. How do you drink it? You use the liquid to inoculate a larger batch of sweet tea or fruit juice.
1. Prepare your base: Make 1 litre of herbal tea or fruit juice. Dissolve about 50 to 100 grams of sugar into it. Let it cool to room temperature.
2. Add the bug: Strain 50ml to 100ml of liquid from your ginger bug starter. Add this to your sweet base liquid.
3. Replenish the bug: Add water and sugar back to your original ginger bug jar to replace what you took out.
4. Bottle it: Pour your soda mixture into flip-top bottles. These bottles are strong enough to hold pressure.
5. Second Ferment: Leave the bottles at room temperature for 1 to 3 days. The yeast will eat the new sugar and create fizz.
Be careful! Pressure builds up fast. Check a bottle daily. This creates a drink with trace alcohol content (usually less than 1%, but it can vary). Always refrigerate once carbonated to stop the process.
You can learn more about the science of fermentation and health from Harvard Health.
Storing Your Ginger Bug for the Long Term
You might not want to make soda every day. That is fine. You can put your bug to sleep.
The Fridge Method
Place your jar in the fridge. The cold slows the yeast down significantly. This is called dormant fridge storage. In this state, you only need to feed it once a week. Take it out, let it warm up slightly, feed it sugar and ginger, and put it back.
Waking It Up
When you are ready to brew again, take the jar out of the fridge. Pour out half the liquid (you can use it for a marinade) and replace it with fresh water. Start the daily feeding routine again. Reviving inactive culture usually takes 1 to 2 days of warmth and food.
Long Breaks
If you are going on holiday, you can add extra sugar and put it in the fridge. It can survive for a few weeks without attention. However, it might take longer to wake up afterwards.
Fibre and diverse diets are important for gut health, as explained by Nutrition.org.uk. Keeping your gut flora diverse with homemade ferments is a great strategy.
The Bottom Line
Making a ginger bug starter is a rewarding entry into the world of fermentation. It is cheap, simple, and creates delicious results. By mixing ginger, sugar, and water, you harness the power of nature to make your own sparkling drinks.
Remember to use organic ingredients and filtered water for the best results. Keep an eye out for mould, but do not be afraid of a little sediment. With a little care, your ginger bug can live for years, providing you with endless batches of healthy, homemade soda.
For more scientific context on the compounds found in ginger, you can look at research on PubMed. And to understand the broader importance of our gut microbiome, Gut Microbiota for Health is an excellent resource.
Start your jar today, and in five days, you could be sipping your first glass of homemade ginger beer.