Houseplants have surged in popularity across the UK, becoming a staple in modern interior design and a vital tool for mental wellbeing. Among the Monstera and Ficus varieties, there is a humble, homegrown project that has captured the imagination of novice gardeners and seasoned botanists alike: the avocado tree.
Instead of discarding the large seed found in the centre of your breakfast guacamole ingredients, you can repurpose it. Growing an avocado tree from a pit in water is a rewarding, scientific experiment that unfolds right on your windowsill. It transforms kitchen waste into a lush, decorative plant.
While getting an indoor avocado plant to bear fruit is notoriously difficult and requires years of patience, the process of germination itself is deeply satisfying. It offers a front-row seat to the biological marvel of root development and shoot growth.
This article provides a comprehensive, step-by-step guide to the water propagation method. We will explore the science behind the seed, how to manage the delicate germination stages, and the best practices for ensuring your sapling survives the transition to maturity.
Overview
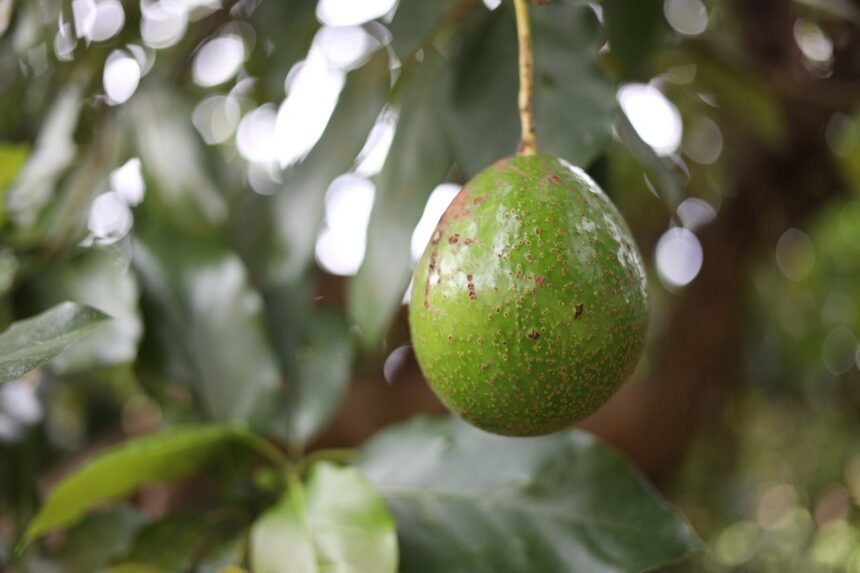
The avocado (Persea americana) is a tree native to the Americas, likely originating in the highlands bridging south-central Mexico and Guatemala. In its natural habitat, it can grow to imposing heights, but as a houseplant, it serves primarily as an attractive foliage plant.
The method we are discussing—growing an avocado tree from a pit in water—is essentially a rudimentary form of hydroponics. By suspending the seed over water, you allow the taproot to descend and hydrate whilst keeping the upper section dry to prevent rot.
This process is favoured by beginners because it is visual. Unlike planting directly into soil, where the magic happens hidden underground, the water method allows you to witness every stage of life. From the initial cracking of the outer shell to the emergence of the pale taproot, the process is a slow-burn thriller for plant lovers.
However, it is not without its challenges. Seeds can fail to germinate, succumb to mould, or dry out if not monitored. Understanding the biological requirements of the pit is essential for success. This tutorial focuses on the ‘toothpick method’, the most reliable technique for home growers looking to propagate avocados without specialised equipment.
Symptoms/Causes
In the context of gardening, we can view the growth of the seed through the lens of ‘symptoms’ of life and ’causes’ of failure. Understanding what a healthy seed looks like versus a struggling one is paramount.
Symptoms of a Viable Seed
Before you begin, you must assess the health of your pit. Not all avocados purchased from the supermarket are capable of germination. Fruit that has been refrigerated for extended periods or harvested too early may contain non-viable embryos.
Visual Indicators of Health:
- Firmness: A healthy pit should feel solid and dense, much like a stone. If it yields significantly to pressure or feels hollow, the embryo inside may be desiccated.
- Colour: Beneath the brown, papery skin (the seed coat), the seed should be a cream or off-white colour. Dark brown or black spots on the seed surface after cleaning can indicate fungal infection or rot.
- The Crack: The first ‘symptom’ of successful germination is a vertical crack. This fissure travels the length of the pit. It signals that the embryo is swelling with water intake and prepares the way for the taproot.
Causes of Germination Failure
Even with the best intentions, growing an avocado tree from a pit in water can sometimes fail. Identifying the underlying cause helps you adjust your approach for the next attempt.
Fungal and Bacterial Rot:
One of the most common causes of failure is the accumulation of slimy pathogens in the water. If the water is not changed frequently, bacteria flourish, attacking the seed’s base. This presents as a foul smell and cloudy water.
Desiccation (Drying Out):
If the water level drops below the base of the seed, the developing root nodes can dry out within hours. Once the sensitive embryonic tissue desiccates, it is often impossible to revive.
Temperature Stress:
Avocados are warm-climate plants. Germination is triggered by warmth. If your windowsill is draughty or the ambient temperature drops below 15°C (59°F), the seed may enter a state of dormancy or simply rot before it sprouts.
Toxicity Concerns:
It is also worth noting the biology of the plant regarding other household inhabitants. Avocado leaves and pits contain a fungicidal toxin called persin. While generally safe for humans in small quantities, it can be toxic to domestic animals.
Treatment/Management
Think of the propagation process as a ‘treatment’ plan for your avocado pit. You are creating a controlled environment to coax life out of dormancy. This section details the management of the seed from extraction to the potting stage.
The Preparation Phase
1. Extraction and Cleaning:
Carefully cut the avocado fruit without slicing into the seed. Remove the pit and wash it thoroughly in lukewarm water. You must remove all traces of the green fruit flesh. Residual fruit is a magnet for mould and will spoil the water quickly. You can use a soft scrubbing brush to ensure it is pristine.
2. Orientation:
Identifying the ‘top’ and ‘bottom’ is critical. The bottom is usually flatter and may have a lighter-coloured circular patch; this is where the roots emerge. The top is slightly pointier; this is where the stem will rise. If you suspend it upside down, it will not grow.
The Toothpick Method (The Procedure)
3. Insertion:
Take three or four sturdy toothpicks. Pierce them into the seed at a slight downward angle, spaced evenly around the circumference. They should be inserted firmly enough to hold the weight of the seed but not so deep that they damage the core embryo excessively.
4. Suspension:
Place the seed over a glass or jar filled with water. The toothpicks should rest on the rim of the glass. The goal is to have the bottom third of the seed submerged in water, while the top two-thirds remain in the air. Clear glass is recommended so you can monitor the root growth and water clarity.
Ongoing Management
5. Location:
Place your jar in a warm spot with bright, indirect sunlight. A kitchen windowsill is often ideal, provided it is not too cold. Avoid direct, scorching sun initially, as this can cook the seed or promote rapid algal growth in the water.
6. Water Maintenance:
This is the most crucial management step. Change the water every five days to a week. Fresh water replenishes dissolved oxygen, which the developing roots need to breathe, and prevents the buildup of mould and bacteria. If the water becomes cloudy, change it immediately.
The Timeline of Growth
- Weeks 2-4: The brown outer skin will dry and peel off. The pit will crack vertically.
- Weeks 4-8: A dominant taproot will emerge from the bottom. Do not let this dry out. Eventually, a small sprout will appear at the top.
- Weeks 8-12: The taproot will branch out, and the stem will grow leaves.
Transitioning to Soil
Once the stem has reached about 15cm (6 inches) in height and has developed a few sets of true leaves, the water method has served its purpose. The plant will eventually run out of nutrients if left in water alone.
Potting Up:
Select a pot with good drainage holes—avocados hate ‘wet feet’. Use a rich, well-draining potting mix (a mix of compost and perlite works well). Plant the seed carefully, ensuring the top half of the pit remains above the soil line. Covering the stem base completely can cause rot. Water thoroughly and place in a sunny spot.
Tips
To ensure your avocado tree thrives rather than just survives, consider these expert tips for long-term care.
1. Pinching for Bushiness:
Avocado trees naturally want to grow straight up, becoming leggy and sparse. To encourage a bushier, more attractive plant, pinch out the top set of leaves when the stem reaches about 30cm (12 inches). This forces the plant to release hormones (auxins) that stimulate lateral side shoots.
2. Humidity is Key:
As a tropical species, avocados crave humidity. UK homes, especially in winter with central heating, can be very dry. Mist your plant’s leaves regularly or place the pot on a tray of pebbles filled with water to increase the local humidity.
3. Water Quality:
If you live in a hard water area, the excess minerals can sometimes cause leaf tip burn. Using filtered water or collected rainwater for your water changes can result in healthier root development.
4. Patience is Essential:
Do not be discouraged if nothing happens for the first month. Some seeds are stubborn and can take up to eight weeks to show signs of cracking. As long as the seed is not mushy or rotten, keep managing the water levels.
5. Lighting:
While the seed germinates in indirect light, the established plant loves the sun. South-facing windows are best in the Northern Hemisphere. If the leaves turn yellow, it may be getting too much direct light or, conversely, suffering from overwatering.
6. Fertilisation:
Once in soil, feed your plant with a balanced liquid houseplant fertiliser every two weeks during the growing season (spring and summer). Do not feed during the winter dormancy period.
The Bottom Line
Growing an avocado tree from a pit in water is a low-cost, high-reward project that connects you with the natural cycle of life. It requires minimal equipment—just a seed, some toothpicks, a jar of water, and patience.
While your indoor tree is unlikely to provide a harvest of guacamole ingredients due to pollination complexities and indoor constraints, it produces a beautiful, glossy-leaved houseplant that can grow for years. It is an excellent educational activity for children and a therapeutic hobby for adults.
By following the management steps of frequent water changes and careful observation, you can successfully nurture a tropical tree right in your UK kitchen. Even if your first attempt fails, the next batch of guacamole always offers another chance to try again.