The Pistol squat is often considered the “holy grail” of bodyweight exercises. It is a feat of strength that requires a unique blend of power, flexibility, and poise. Unlike a standard air squat, this unilateral movement isolates one leg at a time, exposing imbalances and building incredible lower-body power.
Whether you are a seasoned athlete or a calisthenics enthusiast, mastering the Pistol squat can take your athletic performance to the next level. In this guide, we will break down the mechanics, benefits, and progressions of this elite exercise to help you perform it safely and effectively.
What Exactly Is a Pistol Squat?
A Pistol squat is a single-leg squat where the non-working leg is held straight out in front of the body, parallel to the floor. The result resembles the shape of a pistol, hence the name. It is a functional movement that demands significant core engagement and knee stability.
According to the NHS, incorporating strength-based movements into your weekly routine is vital for long-term health. The pistol squat fits perfectly into this, offering a challenging way to build single-leg strength without the need for heavy gym equipment.
The Benefits of Going Single-Leg
Why should you struggle through the learning curve of a Pistol squat? The benefits extend far beyond just looking impressive at the gym.
- Improved Ankle Mobility: To reach the bottom of a pistol squat, your ankles must be incredibly mobile. Research in Gait & Posture journals suggests that limited ankle dorsiflexion can affect balance and movement patterns.
- Enhanced Balance Training: Standing on one leg forces your stabiliser muscles to work overtime. Harvard Health notes that balance exercises are crucial for preventing falls as we age.
- Joint Health: When performed with correct form, unilateral exercises can improve joint health by strengthening the muscles surrounding the knee and hip. The Cleveland Clinic emphasises the importance of muscle support for joint longevity.
- Posterior Chain Engagement: This move heavily recruits the glutes and hamstrings, collectively known as the posterior chain, which is vital for explosive movement and posture.
Pistol Squat vs Standard Squat
While both movements are valuable, they serve different purposes in a functional fitness programme. Below is a comparison to help you understand where each fits.
| Feature | Standard Squat | Pistol Squat |
|---|---|---|
| Primary Focus | Overall leg mass and power | Balance, mobility, and unilateral strength |
| Mobility Requirement | Moderate | Very High |
| Core Engagement | High (with weights) | Extremely High (bodyweight) |
| Equipment Needed | Optional (Barbell/Dumbbells) | None |
Step-by-Step: How to Perform a Pistol Squat
Before you dive in, ensure you have warmed up your joints. Studies published in the British Journal of Sports Medicine suggest that a dynamic warm-up can significantly reduce the risk of injury.
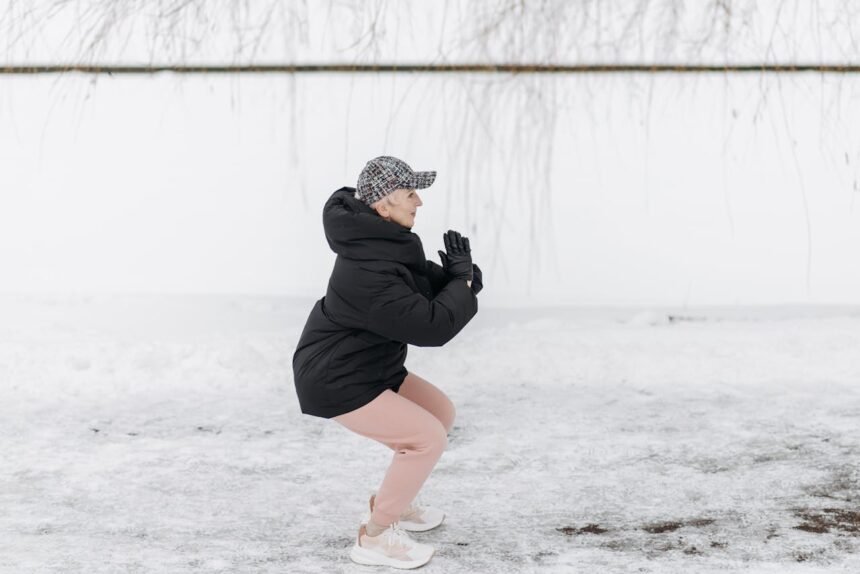
- The Setup: Stand with your feet hip-width apart. Lift one leg off the ground and extend it straight in front of you.
- The Descent: Shift your weight onto the standing heel. Slowly lower your hips toward the floor while keeping your chest upright. This requires intense eccentric control.
- The Bottom Position: At the lowest point, your hamstrings should be close to your calf, and your front leg should remain elevated and straight.
- The Drive: Push through the mid-foot and heel of the standing leg to return to a standing position. Engage your glutes and maintain hip flexor strength to keep the non-working leg lifted.
For more on specific muscle recruitment, WebMD provides detailed insights into how the quadriceps function during single-leg movements.

Progression: How to Get Your First Rep
Don’t be discouraged if you can’t perform a full Pistol squat immediately. Most people need weeks of specific training to develop the necessary ankle mobility and strength. Experts at Verywell Fit recommend several regressions:
1. Box Squats
Sit back onto a bench or box using only one leg. As you get stronger, utilise a lower surface to increase the range of motion.
2. Assisted Pistol Squats
Hold onto a pole, door frame, or TRX straps for support. This allows you to focus on the movement pattern while removing some of the weight from your leg.
3. Eccentrics (Negatives)
Focus only on the lowering phase of the movement. Take 3 to 5 seconds to reach the bottom, then use both feet to stand back up. Research in Nature highlights that eccentric training is highly effective for building muscle strength.
Safety and Common Mistakes
The Pistol squat puts significant stress on the patellofemoral joint. It is essential to listen to your body. The Arthritis Foundation advises that any sharp pain in the knee should be a signal to stop and reassess your form.
Common mistakes include:
- Heel Lifting: If your heel leaves the floor, you likely lack ankle mobility. This shifts the stress to the knee joint.
- Knee Valgus: This is when the knee caves inward. Focus on keeping your knee tracked over your toes. The Mayo Clinic emphasizes that proper alignment is key to preventing ligament strains.
- Rounding the Back: While a slight lean is necessary, excessive rounding can strain the lower back. Keep your core tight.
For more on the science of movement, ScienceDaily often covers the latest findings in biomechanics that support these safety guidelines.
The Verdict
Mastering the Pistol squat is a journey that rewards you with incredible lower-body power and balance. By following a structured calisthenics programme and focusing on eccentric control, you can achieve this milestone. Remember that consistency is key, as noted in various Cochrane Library reviews on exercise interventions.
Whether your goal is improved athletic performance or general functional fitness, the pistol squat is a tool worth having in your arsenal. For further reading on bodyweight movements, check out Medical News Today.
Frequently Asked Questions (FAQs)
Are pistol squats bad for your knees?
For healthy individuals with good mobility, the Pistol squat is not inherently dangerous. However, if you have pre-existing knee issues, the high compression forces can be problematic. Always prioritise form and progress slowly. Studies in the Journal of Strength and Conditioning Research suggest that unilateral training can actually help rehabilitate certain imbalances when done correctly.
How long does it take to learn a pistol squat?
The timeline varies depending on your starting single-leg strength and ankle mobility. Generally, with consistent practice (2-3 times per week), most people can see significant progress within 4 to 8 weeks. Reviewing evidence on PubMed shows that neuromuscular adaptations occur relatively quickly in the early stages of a new exercise.
Can I do pistol squats every day?
Because the Pistol squat is a high-intensity unilateral movement, it is better to treat it like heavy lifting. Your muscles need time to recover. Aim for 2 to 3 sessions per week, allowing at least 48 hours of rest between sessions for optimal recovery and joint health.