If you have been exploring the world of gut health, you have likely encountered the concept of fermentation. From kimchi to kombucha, fermented foods are celebrated for their ability to introduce beneficial bacteria into our digestive systems.
However, there is a simpler, more accessible entry point into home fermentation that requires minimal equipment: the ginger bug. This wild fermentation culture is the backbone of traditional, homemade ginger beer and various other naturally carbonated sodas.
Unlike commercial sodas laden with high-fructose corn syrup and artificial additives, beverages made from a ginger bug are teeming with life. They offer a refreshing way to hydrate while potentially supporting your immune system. If you have ever wondered Are Ginger Shots Actually Good for Your Immunity?, creating a ginger bug is the next logical step in harnessing the power of this rhizome.
This guide will walk you through the science, the method, and the maintenance of a thriving ginger bug, ensuring you can produce delicious probiotic soda alternatives right in your own kitchen.
What Is a Ginger Bug?
A ginger bug is a slurry of fresh ginger, sugar, and water that has been allowed to ferment. It serves as a wild yeast fermentation starter. Unlike commercial baking yeast which is a monoculture, a ginger bug captures wild yeasts and beneficial bacteria naturally present on the ginger skin and in the air.
The primary organisms at work here are Saccharomyces cerevisiae (yeast) and various Lactobacillus species. When you combine ginger and sugar with water, the yeast consumes the sugar and produces carbon dioxide (carbonation) and a trace amount of ethanol. Simultaneously, the Lactobacillus bacteria benefits come into play, producing lactic acid which gives the drink a pleasant tang and acts as a natural preservative.
Many people ask about the difference in ginger bug vs kombucha. While both are fermented beverages, kombucha requires a specific SCOBY (Symbiotic Culture of Bacteria and Yeast) and tea. A ginger bug is spontaneously fermented using only the ginger root itself, making it much easier to start from scratch without obtaining a mother culture from someone else.
The Health Potential of Fermented Ginger
Ginger itself is a powerhouse. It contains gingerol, a substance with powerful anti-inflammatory and antioxidant properties. When you ferment ginger, you may increase the bioavailability of these compounds. For a deeper dive into the raw ingredient, it is worth reading about Fresh Ginger: Selection, Storage, and Health Uses.
Furthermore, the probiotics generated during the homemade ginger beer process may aid digestion. Research indicates that probiotics can help balance the friendly bacteria in your digestive system. This balance is crucial, as an imbalance has been linked to digestive issues, allergies, and even mental health challenges.
Essential Ingredients and Tools
Before you begin, you must gather the right materials to ensure success. Fermentation is a biological process, and it requires a clean environment.
1. The Ginger
Organic ginger root selection is critical. Conventional ginger is often irradiated or treated with growth inhibitors that prevent sprouting; these treatments can also kill the wild yeasts and bacteria necessary for fermentation. Always choose organic ginger to ensure a healthy microbial population.
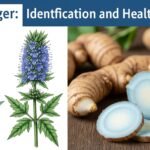
If you are feeling adventurous or have access to exotic markets, you might even explore variants like those discussed in Blue Ginger: Identification and Health Benefits, though standard yellow ginger is most reliable for beginners.
2. The Water
Your water quality matters immensely. Tap water often contains chlorine or chloramine, which are designed to kill bacteria. Since we want bacteria to thrive, you must use chlorine-free water for fermentation. You can use filtered water, spring water, or simply leave tap water out in an open vessel for 24 hours to allow the chlorine to evaporate (though this does not remove chloramines).
3. The Sugar
White granulated sugar works best for the bug itself. The yeast finds it easiest to digest. While you might use honey or maple syrup for flavouring the final drink, stick to cane sugar for the starter culture.
Step-by-Step Guide to Starting Your Bug
Creating a ginger bug is a process of patience. It generally takes 5 to 7 days to become active.
Day 1: The Setup
Combine 250ml (1 cup) of water, 2 teaspoons of sugar, and 2 teaspoons of chopped or grated ginger (skin on) in a clean glass jar. Stir well to dissolve the sugar. Cover the jar with a breathable cloth, like cheesecloth or a coffee filter, secured with a rubber band. This keeps pests out but allows wild yeast from the air to enter.
If you are growing your own supply, consult The Ultimate Guide to Ginger Plant Care at Home to ensure your harvest is ready for use.
Days 2–5: Feeding the Bug
Daily maintenance is required. This process is known as feeding your ginger bug. Every 24 hours, add:
- 2 teaspoons of fresh chopped ginger.
- 2 teaspoons of sugar.
Stir vigorously each time. This aeration provides oxygen, which the yeast needs in the early stages to reproduce rapidly.
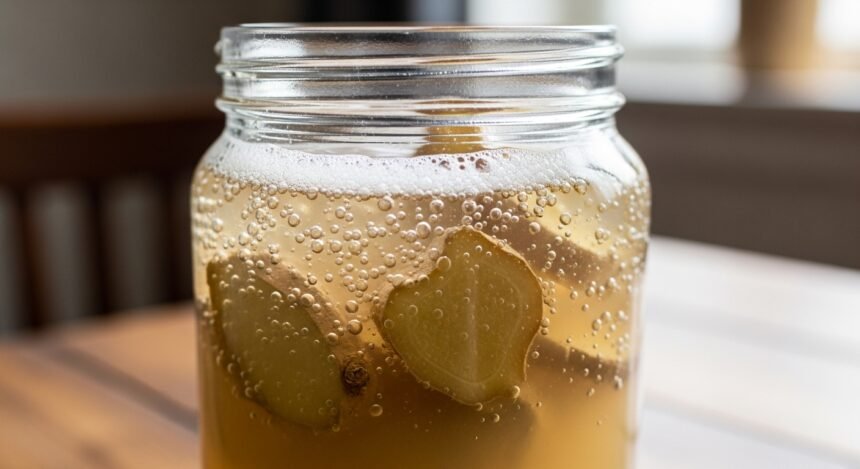
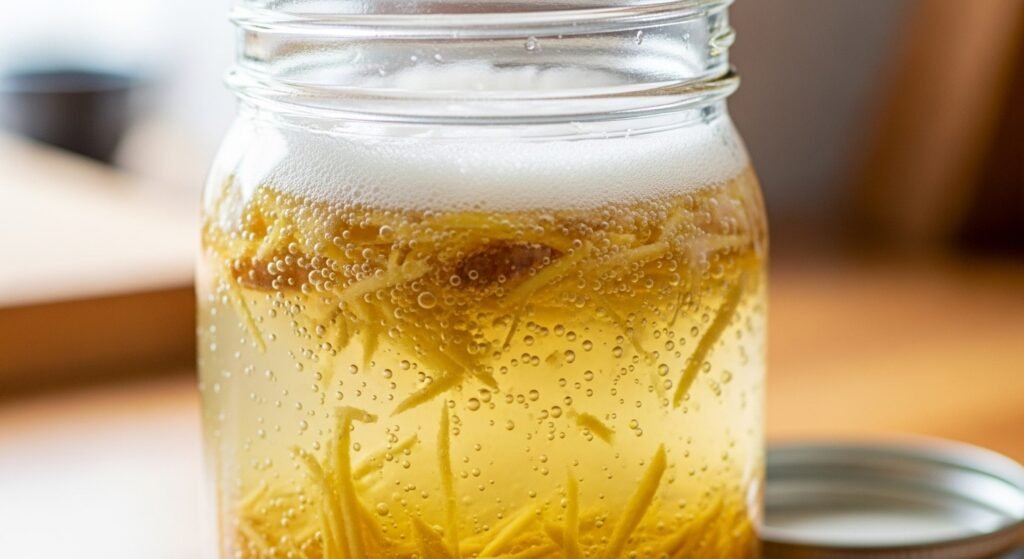
Monitoring for Activity
You are looking for signs of active fermentation. By day 3 or 4, you should see bubbles forming at the top, a white precipitate at the bottom, and the mixture should smell yeasty and slightly sour—similar to beer or sourdough starter. If it smells like rotting vegetables, discard it and start over.
Fermentation temperature control plays a massive role here. In cooler climates (below 20°C/68°F), fermentation will be slow and may take up to 10 days. In warmer kitchens, it might be ready in 3 days. According to the Mayo Clinic, temperature consistency is key to safe fermentation.
How to Use Your Ginger Bug
Once your bug is bubbly and active, it is ready to create sodas. The basic ratio is usually roughly 50-100ml of ginger bug liquid per litre of fruit juice or sweetened herbal tea.
For a classic approach, you might follow a method similar to How to Make Ginger Juice for Better Digestion to create a base, then add the bug to carbonate it.
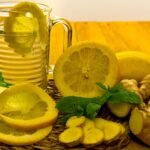
- Prepare your base: This could be a sweetened lemon juice (for lemonade) or a strong ginger decoction (for ginger beer). Ensure the base is at room temperature before adding the bug, as heat will kill the probiotics.
- Inoculate: Strain the required amount of liquid from your ginger bug and stir it into your base.
- Replenish: Replace the water and sugar you took from the jar and add a little fresh ginger to keep the colony going.
- Bottle: Pour the mixture into fermentation-grade bottles (flip-top bottles work best).
- Second Ferment: Let the bottles sit at room temperature for 1–3 days. This is when carbonation builds up.
For flavour inspiration, consider the profiles found in Ginger Syrup Recipes for Drinks and Desserts, as these syrups can be diluted and fermented using your bug.
Troubleshooting Common Issues
Even with the best intentions, things can go wrong. Here is how to handle common setbacks.
Mould vs. Yeast
One of the most common anxieties is distinguishing between healthy yeast and ginger bug mould issues.
- Kahm Yeast: A thin, white, powdery film on the surface. It is harmless but can affect flavour. Skim it off.
- Mould: Fuzzy spots that are green, black, or blue. The USDA Food Safety and Inspection Service advises that if you see mould on soft food or liquids, the entire batch must be discarded.
The Bug is Flat
If you see no bubbles after 7 days, your water may have had too much chlorine, or the ginger was not organic. Alternatively, it might be too cold. Try moving it to a warmer spot, like the top of the fridge.
It Become Syrupy
Sometimes the liquid becomes viscous or “ropey.” This is usually due to a specific bacterial strain (Pediococcus) often found in vegetable ferments. It is harmless but has an unpleasant texture. Often, leaving it to ferment for a few more days allows the acid balance to shift, resolving the texture.
Safety and Alcohol Content
While we often refer to these as non-alcoholic fermented drinks, it is chemically impossible to ferment sugar with yeast without producing some alcohol.
However, in short ferments like ginger ale, the alcohol content is typically very low (often below 0.5% or 1%), similar to a very ripe banana or some fruit juices. The National Institutes of Health (NIH) provides extensive data on fermentation byproducts, noting that short fermentation times limit ethanol accumulation.
If you are strictly avoiding alcohol for medical or religious reasons, be aware of this trace content. For a completely alcohol-free option, you might prefer Soothing Your Stomach with Ginger Root Tea instead.
Furthermore, always exercise caution with wild plants. If you are foraging ingredients to add to your sodas, ensure you have read Wild Ginger: Safety and Culinary Applications to avoid toxic lookalikes.
Keeping Your Bug Alive
A ginger bug is a living pet. If you bake, you know the drill; it is similar to maintaining a sourdough starter.
If you use it daily, feed it daily. If you want to take a break, put the jar in the fridge. The cold creates a state of dormancy. Feed it once a week while refrigerated. To reactivate, bring it to room temperature and feed it daily for two days before using.
This cycle supports sustainable kitchen practices, allowing you to create endless litres of soda from a single root. You can even use the discarded ginger pieces from the bug in chutneys, similar to how one might utilise ingredients discussed in The Nutritional Benefits of Pickled Ginger.
Advanced Tips for Potency
Once you have mastered the basic bug, you can experiment to increase the vigour of your ferment.
- Mineral Content: Adding a pinch of unrefined sea salt or a raisin can provide minerals that boost yeast activity.
- Surface Area: Grating the ginger rather than chopping it increases surface area, releasing more gut health enzymes and wild yeasts into the solution.
- Concentration: If you are interested in more concentrated forms of ginger for other health applications, you might explore Understanding the Uses of Potent Ginger Extract.
The Bottom Line
Starting a ginger bug is a rewarding, low-cost way to introduce probiotics into your diet. It connects you to the ancient tradition of food preservation and allows you to control exactly what goes into your glass.
By selecting the right organic ginger, using chlorine-free water, and maintaining consistent temperatures, you can create a robust culture that lasts for years. Whether you are looking to replace sugary store-bought sodas or simply want to explore the science of fermentation, the ginger bug is the perfect place to start.
Remember, fermentation is as much an art as it is a science. Observe your jar, smell the changes, and enjoy the process of cultivating your own living foods.
- For further reading on microbial diversity: The Microbiology Society on Fermentation.
- On the benefits of ginger: Medical News Today: Ginger Benefits.
- Dietary guidelines: NHS Eat Well Guide.
- Sugar and yeast interaction: Cleveland Clinic: Yeast and Sugar.
- Probiotics overview: WebMD: What are Probiotics?.
- Lactobacillus specifics: ScienceDirect: Lactobacillus.
- General food safety: FDA: Fermented Food Safety.