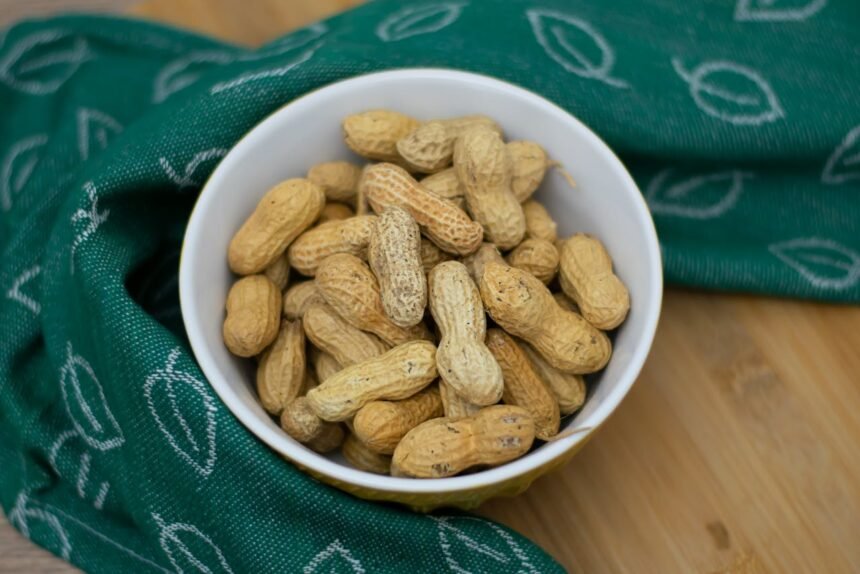
Harvesting peanuts—often referred to as groundnuts in the UK—is the rewarding culmination of a long growing season. Unlike fruits that ripen visibly on the branch, the peanut develops underground, making the determination of harvest readiness both an art and a science.
For the small-scale grower or allotment holder, industrial combines are neither practical nor affordable. Instead, success relies on a curated selection of manual and semi-mechanical equipment.
Using the correct peanut harvesting tools not only reduces physical labour but also significantly impacts the quality, flavour, and shelf-life of your yield. Improper handling during extraction can lead to pod damage, rot, or the development of harmful moulds.
This article explores the essential tools required for a successful harvest, the signs of maturity to look for, and best practices for curing your crop.
Understanding the Harvest Cycle: When to Dig
Before you reach for your tools, you must establish that the crop is actually ready. Peanuts are indeterminate growers, meaning they flower and peg over a long period. Consequently, pods on the same plant will vary in maturity.
Harvesting too early results in shrivelled kernels with poor flavour, while harvesting too late can cause the pegs (the stems holding the pods) to weaken, leaving the pods detached in the soil.
The Hull Scrape Method
To determine readiness, experts often recommend the “hull scrape” method or the peanut maturity pod blast test. This involves removing the outer layer of the shell (exocarp) to reveal the mesocarp colour.
As the peanut matures, this colour changes from white to yellow, then orange, brown, and finally black. A crop is generally ready when approximately 70% of the pods show a dark inner hull colour.
Determining this timing is crucial for backyard peanut harvest timing. You can learn more about starting your crop correctly in our article on Growing Your Own: Best Practices for Organic Peanut Seeds.
For a detailed guide on maturity profiling, the NC State Extension offers excellent resources on pod blasting and colour charts.
Essential Excavation Tools
Once maturity is confirmed, the physical work begins. The goal is to lift the plant and its root mass gently to avoid snapping the pegs.
1. The Garden Fork
A standard spade often slices through the soil, risking damage to the pods. A heavy-duty garden fork for root crops is preferred. The tines allow loose soil to fall away while lifting the root mass.
This is the most accessible tool for allotment peanut growing challenges, where space is tight and heavy machinery isn’t an option. Insert the fork roughly 15 centimetres (6 inches) away from the main stem to ensure you are under the pod zone before leveraging the plant up.
2. Manual Groundnut Digger
For those with slightly larger plots, a manual groundnut digger or a specialized U-bar digger can be a game-changer. These tools use a broad, U-shaped blade that slices under the soil to loosen the taproots of an entire row simultaneously.
This method mimics traditional peanut digging methods but with better ergonomic design to save your back. If you are scaling up, you might want to consider how your planting equipment affects harvest; read more in Choosing the Right Peanut Planter for Your Allotment or Farm.
For more on small-scale agricultural tools, Alabama A&M University provides resources on sustainable farming equipment suitable for smaller operations.
Tools for Curing and Drying
Freshly dug peanuts have a moisture content of 35% to 50%. This must be reduced to below 10% for safe storage. This process, known as curing, is critical for developing that signature nutty flavour.
3. Inversion Supplies
Immediately after digging, plants should be “inverted”—flipped upside down so the peanuts are exposed to the sun and wind while the foliage rests on the ground. This prevents soil moisture from rotting the pods.
4. Drying Racks
In the damp UK climate, leaving peanuts on the ground is risky. Constructing peanut drying rack designs using wood and chicken wire allows for better airflow. These racks keep the pods elevated and safe from ground pests.
Curing peanuts naturally on racks can take 2 to 4 weeks. During this time, the foliage dries out and can be repurposed. In fact, the dried vines are highly nutritious; discover more in The Nutritional Benefits of Peanut Hay for Livestock.
Proper drying protocols are outlined by the University of Georgia Extension, a leading authority on peanut production.
Picking and Shelling Equipment
Once the peanuts are cured, they must be separated from the vines (picking) and, depending on your usage, removed from their shells.
5. Manual Pickers
For small harvests, hand-picking is standard. However, simple mechanical pickers that strip the pods from the dried vines can speed up post-harvest peanut handling. Once separated, the leftover plant matter makes excellent compost. Learn how to utilize this waste in Peanut Shell Compost: Turning Waste into Nutrient-Rich Soil.
6. Shelling Tools
Removing peanut hulls manually is time-consuming and hard on the fingers. A hand-cranked peanut sheller is an essential investment for anyone processing more than a few kilograms.
These devices use a gentle grinding mechanism to crack the shells without crushing the kernels. This is particularly useful if you plan to process the nuts further, such as for oil extraction. If that interests you, check out A Beginner Guide to Peanut Oil Pressing at Home.
Sustainable Agriculture Research and Education (SARE) often features grants and guides for building or buying small-scale processing equipment.
Storage and Safety Management
Proper storage is the final step in the harvest process. The primary risk during storage is the development of Aspergillus flavus, a mould that produces aflatoxin.
7. Moisture Meters
A grain moisture meter helps ensure your peanuts have reached that critical sub-10% moisture level. This is the best defence for preventing aflatoxin in peanuts.
8. Breathable Storage Bags
Never store peanuts in plastic, which traps moisture. Use burlap or mesh bags (gunny sacks) to allow the nuts to breathe. Storing raw groundnuts in a cool, dry environment is essential to maintain quality.
For detailed safety guidelines, the U.S. Food and Drug Administration (FDA) provides strict standards on aflatoxin limits which are globally relevant.
Cultivar Considerations
The tools you choose may depend slightly on the variety you grow. For instance, Spanish Peanuts: Small Size, Big Flavour and High Oil Content often adhere more tightly to the peg, requiring more force to thresh than other varieties.
Conversely, A Guide to Valencia Peanuts: Sweetness and Nutrition Profile reveals that Valencias are often easier to hand-harvest due to their bunching growth habit. If you are interested in unique varieties, you might also explore Red Skin Peanuts: Antioxidant Benefits and Culinary Uses.
Tips for Successful Small-Scale Peanut Farming
Here are some practical tips to optimize your harvest:
- Monitor Soil Moisture: If the ground is too hard, water lightly a day before digging to loosen the soil. This reduces the strain on your garden fork for root crops.
- Use Every Part: After shelling, don’t discard the waste. Read about How to Use Peanut Shell Mulch in Your British Garden.
- Roasting for Preservation: Roasting peanuts extends their shelf life significantly. For a healthy option, consider making Dry Roasted Peanuts: A Heart-Healthy Snack Choice.
- Pest Control: During the drying phase, cover your racks with fine mesh to keep rodents and birds away.
For broader gardening advice, the Royal Horticultural Society (RHS) offers general guidance on managing root crops in the UK climate.
The Bottom Line
Investing in the right peanut harvesting tools transforms a laborious chore into a manageable and satisfying process. For small-scale peanut farming, you do not need industrial machinery; a sturdy fork, a drying rack, and perhaps a hand-cranked sheller are often sufficient.
By focusing on correct timing, gentle excavation, and thorough curing, you ensure that your peanuts are safe, delicious, and ready for whatever culinary purpose you have in mind. Whether you are using a peanut moisture content guide or simply relying on the look and feel of the pod, patience during the harvest is your most valuable tool.
For more information on global standards and post-harvest operations, the Food and Agriculture Organization (FAO) and the National Peanut Board are invaluable resources. Additionally, Clemson Cooperative Extension offers specific advice on drying and roasting at home.