

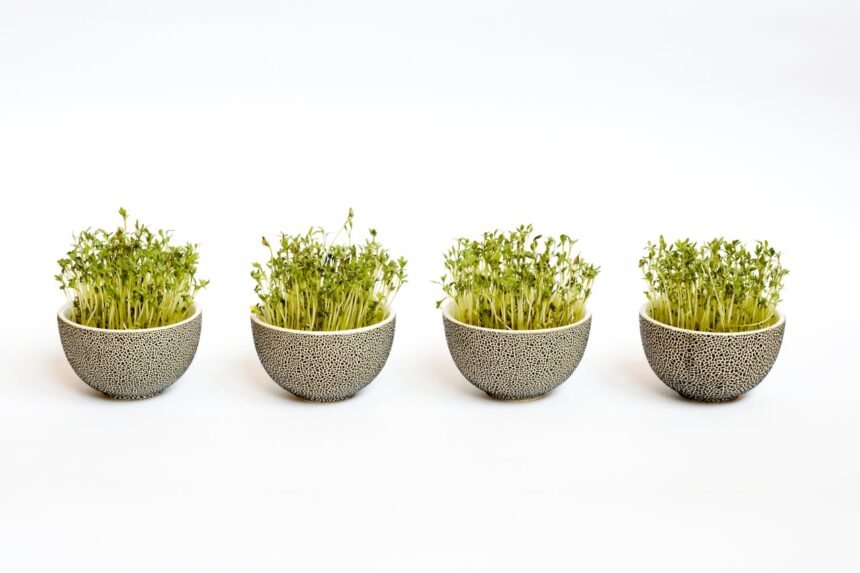
In recent years, the trend of urban farming has moved from the countryside into our kitchens. If you are looking for a simple, space-efficient way to boost your daily nutrient intake, an organic microgreens kit might be your new best friend. These tiny, vibrant greens are not just a culinary garnish; they are nutritional powerhouses that can be grown right on your kitchen counter.
Whether you have a sprawling garden or a compact city flat, growing your own nutrient-dense greens is easier than you think. In this guide, we will explore why these kits are essential for plant-based nutrition and how you can start your own windowsill garden today.
What Exactly is an Organic Microgreens Kit?
An organic microgreens kit is an all-in-one package designed to help you grow immature greens from the seeds of vegetables and herbs. Unlike sprouts, which are grown in water and eaten whole (including the roots), microgreens are grown in soil or a substrate and harvested just above the soil line.
Most high-quality kits include everything you need: heirloom seeds, a growing medium, and often biodegradable trays. They are specifically designed to facilitate rapid seed germination, allowing you to go from seed to salad in as little as seven to ten days.
The Incredible Health Benefits of Microgreens
Don’t let their size fool you. Research published in Nature suggests that microgreens can contain up to 40 times more vitamins and minerals than their mature counterparts. These tiny plants are packed with antioxidants and polyphenols, which are crucial for fighting oxidative stress.
According to Healthline, consuming microgreens may help reduce the risk of chronic diseases. They are an excellent source of vitamin C, E, and K, as well as beta-carotene. Integrating these into your diet aligns perfectly with the WHO dietary recommendations for increasing fruit and vegetable consumption to improve overall health.
Choosing the Right Method: Soil vs. Hydroponic
When selecting your organic microgreens kit, you will likely choose between a soil-based growing method or a hydroponic system. Both have their advantages, depending on your lifestyle and preferences.
| Feature | Soil-Based Growing | Hydroponic System |
|---|---|---|
| Ease of Use | Very beginner-friendly | Requires more monitoring |
| Flavour Profile | Rich, earthy flavours | Clean, subtle flavours |
| Cleanliness | Can be messy with soil | Very clean and water-based |
| Nutrient Access | Natural minerals from soil | Dependent on added nutrients |
For those prioritising sustainable gardening, many kits now offer coco coir or hemp mats as a clean, sustainable alternative to traditional peat moss. You can find more about sustainable practices through the Royal Horticultural Society (RHS).
Top Varieties to Grow at Home
Not all microgreens are created equal. Depending on your taste buds, you might prefer spicy, nutty, or sweet varieties. Here are some of the most popular choices included in a typical organic microgreens kit:
- Pea shoots: These are crunchy and sweet, tasting exactly like fresh peas. They are high in fibre and protein, as noted by Harvard Health.
- Sunflower microgreens: Large, nutty, and incredibly satisfying. They are a great source of essential amino acids.
- Radish: Fast-growing and spicy, adding a wonderful “kick” to sandwiches and salads.
- Broccoli: Mild in flavour but exceptionally high in sulforaphane, a compound studied by PubMed for its potential heart health benefits.
How to Use Your Organic Microgreens Kit: Step-by-Step
- Preparation: Soak your heirloom seeds if required (larger seeds like peas and sunflowers benefit from a 12-hour soak).
- Sowing: Spread the seeds evenly across the moist growing medium. Do not bury them; they need a bit of air and light to thrive.
- Blackout Phase: Cover the tray for 2-3 days to encourage the seeds to stretch and develop strong roots.
- Lighting: Move the tray to a windowsill garden or under a grow light. Ensure they receive at least 6 hours of light daily.
- Watering: Use a spray bottle to keep the medium damp but not waterlogged. Bottom-watering is often preferred to prevent mould.
- Harvest Time: Once the first set of “true leaves” appears, usually after 7-14 days, use clean scissors to snip the greens just above the soil.
For more detailed growing tips, Gardeners’ World offers excellent advice on indoor propagation.
Nutritional Density and Bioactive Compounds
The science behind microgreens is fascinating. Research in the Journal of Food Composition and Analysis indicates that the concentrations of bioactive compounds are significantly higher in the micro-stage than in mature plants. These include glucosinolates in brassicas, which are linked to cancer prevention according to ScienceDirect.
Furthermore, Frontiers in Plant Science highlights that microgreens are a functional food that can bridge the gap in modern diets lacking fresh produce. By utilising an organic microgreens kit, you ensure your greens are free from synthetic pesticides and fertilisers, keeping your plant-based nutrition as pure as possible.
Integrating Microgreens into Your Meals
While often used as a culinary garnish in high-end restaurants, microgreens deserve a bigger role on your plate. You can toss a handful of pea shoots into a smoothie, layer sunflower microgreens into a wrap, or sprinkle radish microgreens over an avocado toast.
The Mayo Clinic suggests that adding colour and texture to your meals can actually make them more satisfying, helping with portion control and mindful eating. For more ideas on achieving your daily vegetable intake, check the NHS 5-A-Day guide.
Environmental Impact and Sustainability
Choosing an organic microgreens kit also benefits the planet. By growing at home, you eliminate the carbon footprint associated with transporting delicate greens from the farm to the supermarket. Most organic kits prioritise sustainable gardening by using biodegradable trays and compostable materials. You can verify the nutritional data of the seeds you choose through the USDA FoodData Central database.
If you are interested in the broader impact of home-grown food on health, WebMD provides a comprehensive overview of why these “superfoods” are more than just a passing fad.
Frequently Asked Questions (FAQs)
Do I need special lights for my organic microgreens kit?
While a windowsill garden with plenty of natural sunlight is often sufficient, professional grow lights can help during the dark winter months to ensure consistent growth and prevent “leggy” plants.
Can I reuse the soil from my kit?
It is generally recommended to compost the used soil or mats and start fresh for each crop. Microgreens consume most of the immediate nutrients in the surface layer, and reusing soil can increase the risk of fungal issues.
How long do microgreens last after harvest?
Freshly harvested microgreens are best consumed immediately. However, they can stay fresh in the refrigerator for up to 5-7 days if kept in an airtight container with a paper towel to absorb excess moisture.
Is it cheaper to grow your own microgreens?
Absolutely. While an initial organic microgreens kit has a small cost, the price per harvest is significantly lower than buying pre-packaged microgreens at a luxury grocer, which can be quite expensive due to their short shelf life.